A conversion is the end goal of the campaign, it is the action that the end users take on the ads that are displayed through your campaigns, actions like filling a form, installing an app, and viewing a page. You can track a number of conversions, by setting up the tracking at the time of campaign creation. In Colombia, you can track the conversion of webpages and app installs, and videos in near future.
Webpage Conversion Tracking
The conversion of the webpage is tracked through an invisible 1x1 pixel image, also known as a web beacon. You can create this image by placing a unique JavaScript code on the webpage, which you will get from us, and you can create it on any page. Here are the steps for creating it.
Setup Webpage Conversion Tracking
- Get the 1x1 invisible pixel image script from the account manager or send us an email.
- Place the script in the conversion/Thank you page.
Note: Every script has a unique conversion tracking “pixel id”.
The script should be there on the HTML page when you see the source-code so that it can be tracked and tested. It will look something like this.
Here are the steps to check whether the script is working correctly or not.
- Open the page in your web browser in which the script is placed.
- Open the developer tool (press F12).
- Click Network.
- Search your pixel id. For example, if pixel id is 990, search for “pixelId=990”.
You can also add this pixel image in the existing web-based campaigns, conversions post adding the image will be recorded.
App Installs Conversion Tracking
The app installs conversion is tracked through the third-party attribution tracking partners. We are the integrated partner of Apsalar, AppsFlyer and Tune, and support many other as well.
Setup App Installs Conversion Tracking
You need to configure the postback URL or eid or both, which will be provided by us in the above-mentioned tracking partners. Here are steps for configuring.
Apsalar
- Click here, sign in, go to left panel, and click Attribution Tracking.
- Click Postback URLs > Create New Postback.
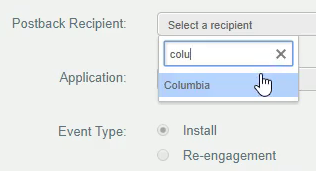
- Select Postback Recipient as Colombia, create Colombia if it is not there.
- Select the application and other necessary details.
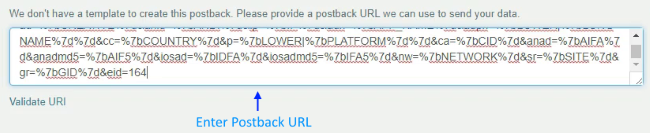
- At the bottom of the page, enter the postback URL.
- Click Create Postback.
Appsflyer
- Sign in, go to the Configuration section, and click Integrated Partners.
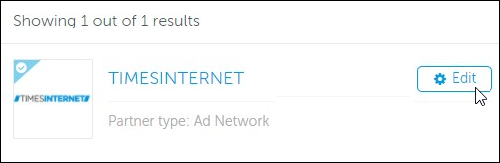
- Select TimesInternet from the list. If it is not on the list then search for it.
- Click Edit.
- Enter eid in the Goal-id (eid) field.
- Click Save & Close.

Tune
- Sign in, go to left panel, then under partners section click Integrations.
- Select the partner.
- Click Postbacks > Templates.
- Select the postback template category.
- Turn the Install event On.
While setting up tracking, a tracking URL will be generated which you need to share with us for campaign creation, here are samples of the URL:
| Attribution Partners | Tracking URLs |
|---|---|
| Apsalar (Generic URL) | http://ad.apsalar.com/api/v1/ad?re=0&a=timesinternet&i=com.et.reader.activities&ca=ET_Android&an=CTN&p=Android&pl=Internal_Campaign&h=9b178d45f2a780bd28594fb097cfbef128276ab0 &cr={{clkId}}_1 |
| Apsalar (Smart URL) | http://ad.apsalar.com/api/v1/ad?re=0&st=470330958252&h=46f11c0abbf6888daed317d9f59dade8377324b7&cr={{clkId}}_1 |
| AppsFlyer | https://app.appsflyer.com/com.xyz.in.abcbank?pid=timesinternet_int&af_click_lookback=7d&clickid={clickid}&android_id={sha1_android_id}&ios={sha1_idfa} |
| Tune | https://06u-y.tlnk.io/serve?action=click&publisher_id=357331&site_id=133717&invoke_id=287419&ref_id={{clkId}}&google_aid={uuid}&my_campaign=Columbia%20CPC%20Campaign |